I has some OS Version Windows Server 2016 Standard.
There’s no gui, only command and Powershell. We have 3 hosts that need the agent installed on them.
Can some one can explain me how to install the Agent.msi on Windows without the GUI?
I’m really no Windows expert, but maybe you can try running the msiexec /i from the command line and then pointing to the .msi package that you wish to install.
Hello, which checkmk agent specific commandline options do we have?
E.g. i’m looking for an option to make the installer instruct to “Remove Legacy Agent” (Which is normally disabled when using the gui)
This is the process that i follow to install the Agent:
Windows provides the ability to automate installations of MSI packages via msiexec.
First, we are going to download the .msi on our server, this can do it by connecting to the server from another machine by UNC with \servername\c$\ and copying the file.
And then we need to execute:
e.g. UP(C:\Users\hhirsch\Downloads>):msiexec /i check_mk_agent.msi /qn
or if we already have the msi on the machine, we can just simply install, using:
e.g. msiexec.exe /i check_mk.msi /quiet /norestart
In this case the agent will be installed under the default path, and then immediately started as a Windows service.
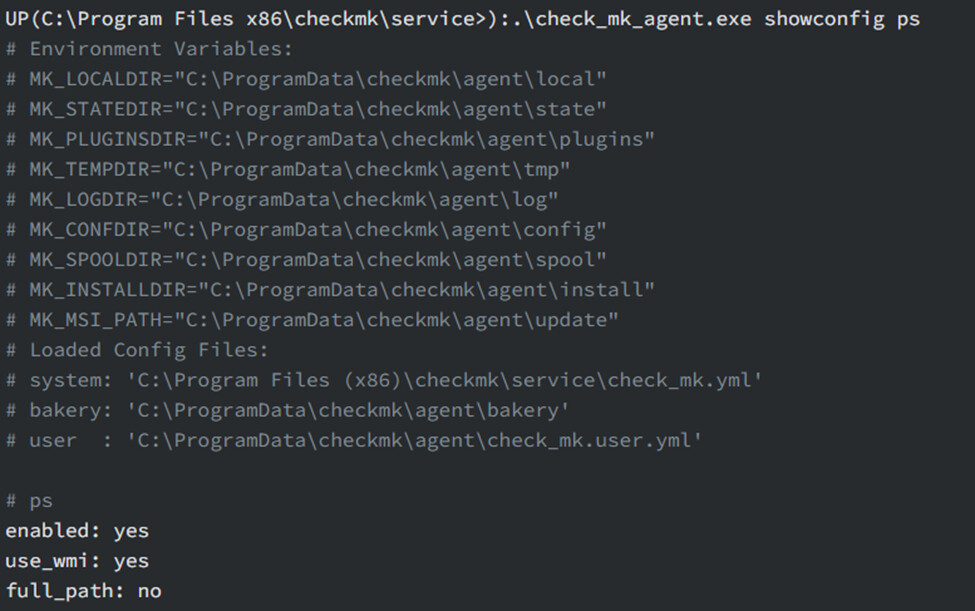
Checking the configuration
To check if the configuration was read in as you expected, call the agent with the showconfig option. With this option you not only get an output of the configuration as it is currently being used by the agent — the environment variables in use, as well as the configuration files will always be shown.
If only a certain part of the configuration is of interest, restrict the output to a specific part. Here, for example, it is checked whether the options for the ‘ps’ section have been set correctly:
In this way you can get a quick overview of how the three different configuration files are merged and used by the agent. Errors are thus immediately visible.
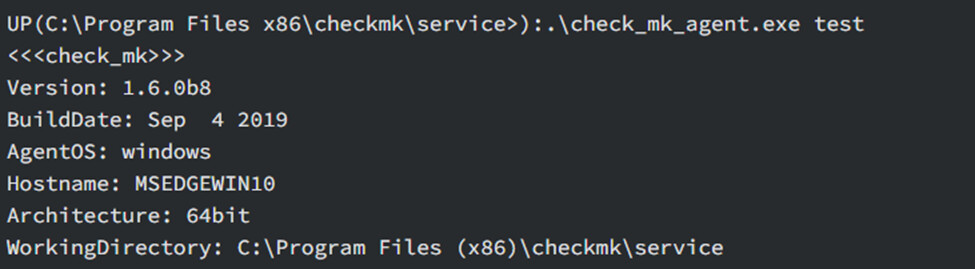
Testing the agent
Use the test option to directly run the agent locally and see immediately if an output can be generated without errors. To save space only the first lines of output are shown in the example here:
Chaining multiple options together on the command line does not seem to achieve the desired options when installing CheckMK agent using MSI on Windows (in my case, Server 2016 - note I’m running without /qn to make sure it’s selecting the options as I wanted to automate this):
MsiExec.exe /I .\check-mk-agent-2.0.0p32-231d80b5763e04c6.msi WIXUI_CLEANINSTALL= WIXUI_REMOVELEGACY= WIXUI_MIGRATELEGACY=“”
Results in Remove Legacy and Migrate from Legacy being selected
but
MsiExec.exe /I .\check-mk-agent-2.0.0p32-231d80b5763e04c6.msi WIXUI_CLEANINSTALL= WIXUI_CLEANLEGACY= WIXUI_MIGRATELEGACY=“” results in only “Migrate Legacy” being selected, which is not what the wiki for 2.0.0 says should happen
Yes, that’s the documentation in question.
In the below suggestion, it would perhaps make more sense to explicitly specify 1 to enable and 0 to disable, rather than have an empty string.
So something like:
To set multiple install options specify “1” to enable that option, or “” to disable it. For example, to remove the legacy agent and perform a clean install but not migrate the legacy agent:
WIXUI_REMOVELEGACY=“1” WIXUI_CLEANINSTALL=“1” WIXUI_MIGRATELEGACY=“”
This topic was automatically closed 365 days after the last reply. New replies are no longer allowed. Contact an admin if you think this should be re-opened.