As far as i know all hosts discovered by the network scan are created disabled by default. Just mark your hosts and mass change them to enabled. (just a few clicks)
The reason why they are created disabled is, you can do the network scan automatically and you don’t like to add hosts they are just shortly plugged in to the network as the scan runs. You always like to review your scanned hosts and may will adjust some values.
This is not clear. I have spent 3 hours and did not find a way to enable them. There is NO enable in the host menu.
Why these red crosses are NOT clickable to allow to enable?
Could you, please, list these “few clicks”, or give an instruction, or note this in the documentation?
This is common tech disease to answer like “it is possible” without any hint or instruction.
Also, here are lots of some extinct terms like WAPO, and some non-existing menu entries.
I have installed the 2022 version, so, please, is it possible to show us where is this Enable function can be found and clicked upon, please?
Thanks
I think, i have deleted 1 host monitoring rule, so now all hosts are in the dashboard, including temporary ones.
There is no more “Host to be monitored” rule. I think, that was it that prevented to monitor disabled hosts.
How to recreate it?
You can mass check the hosts with the check boxes before them. If you like to mass change any of the configuration values to the marked hosts you can use the edit and cleanup function:
(This picture is from 1.6 version, i am currently have no 2.0 running)
The edit function let you add new configuration points or change existing to the same value for all marked hosts. The cleanup function allows you to mass delete one or more configuration values along all marked hosts.
It’s called bulk actions and you can find the documentation on the following page: Host administration - Managing systems being monitored (checkmk.com) - Bulk actions
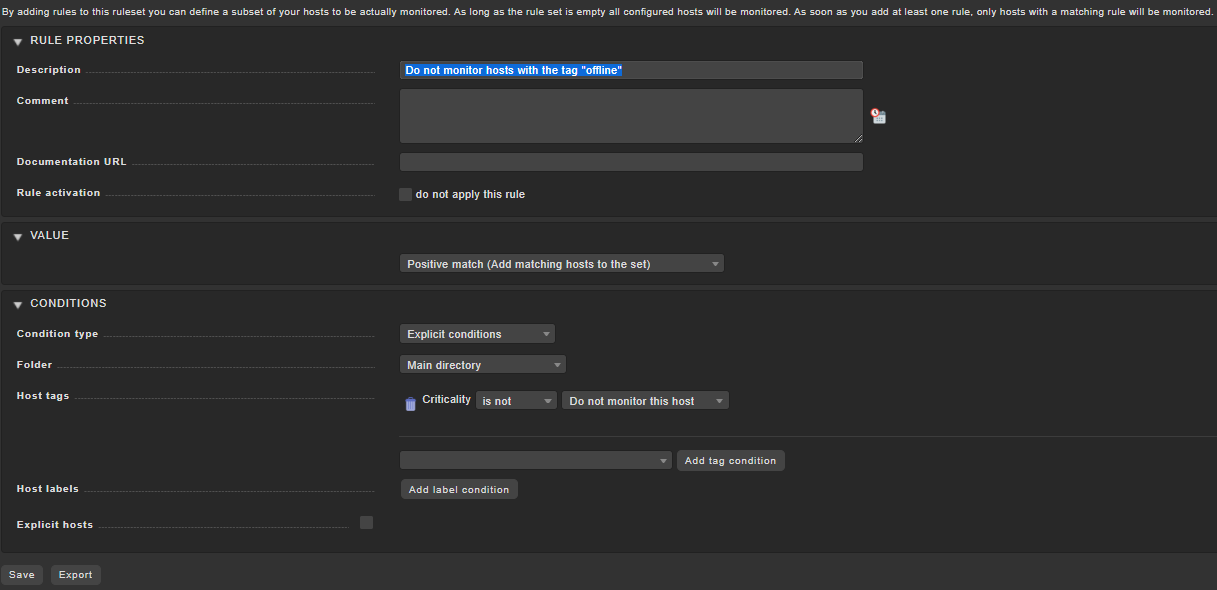
The deleted rule you mentioned disables the monitoring for hosts with the tag which also creates the red X at the host. You can simply recreate this normally built in rule:
OK, thanks.
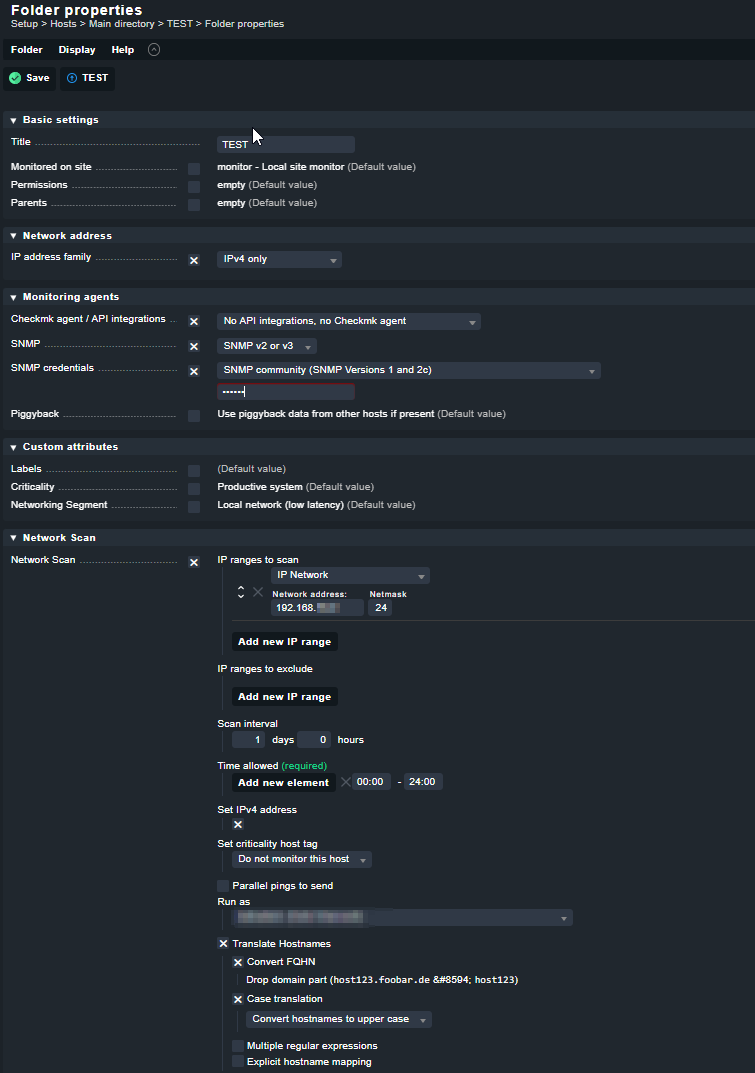
I have figured out that in order to enable the host, i have to go to Setup/Hosts/folder with auto-discovery. Then select hosts to edit, then menu Hosts/On selected hosts/Edit attributes. On the top, in the path you will see something like “bulk operations”. Then on this screen, i have to change Custom attributes/Criticality to any other value from “do not monitor this host”.
Save, red crosses disappear. Apply the configuration using yellow button. Seems to work fine.
This topic was automatically closed 365 days after the last reply. New replies are no longer allowed. Contact an admin if you think this should be re-opened.