
Monitoring of IoT Devices with Tasmota Open Source Firmware
-
Temperature
-
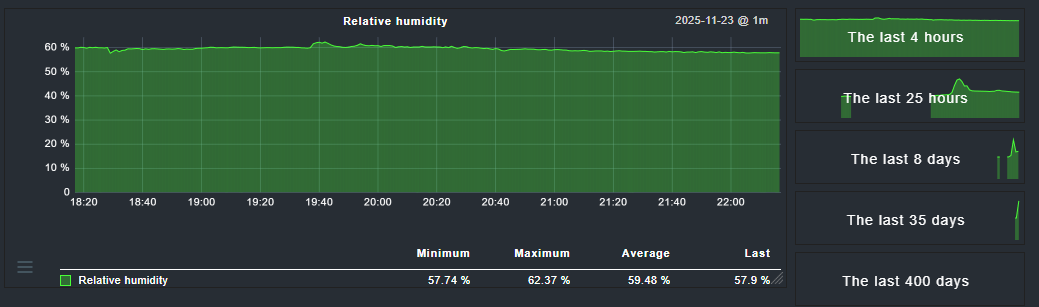
Humidity
-
Light (Lux)
-
CO2
-
etc. - you have thousands of options for using Tasmota to monitor your environment, and it’s cheap!


About Tasmota:
Tasmota Supported Devices:
This check is made privately in my spare time and has nothing to do with any company or customer I work for.

I'm also not responsible if anyone uses this check in a production environment.
Download .mkp Package Tasmota Devices for CheckMK
CheckMK Exchange:
Checkmk Exchange (waiting for approval)
GitHub:
I developed the MKP extension package for Tasmota, so you can monitor your Tasmota devices in CheckMK.
It uses the API request to get all information from your Tasmota device. If you want to extend the package by adding your own sensor, you can call this URL and get a JSON from your device with all the information you need.
http://{args.hostname}/cm?cmnd=Status%200
You can use the agent section “tasmota_status” and extend the package with your own sensors if you know how to develop checks.
I can recommend the following devices for temperature and humidity monitoring:
WiFi Only Option:
This is the device which I am using in this guide and used to develop this .mkp package.
It is easy to install and set up without any needed knowledge of programming.
This device is easy to install and ready in less than 5 minutes to work with Tasmota.
Ethernet with Power over Ethernet (PoE) Option:
If you need Ethernet support including Power over Ethernet (PoE), then this device could maybe work for you (but you will need a serial programmer and some skills for this device to flash Tasmota on it. I have not tried the device as I don’t need it and do not have one to test at home):
Tasmota’s big advantage is that it gives you full local control of IoT devices without relying on cloud services, enabling privacy-friendly, flexible monitoring and automation.
The plugin offers a wide range of monitoring options for your Tasmota devices.
Power Monitoring
For devices with energy monitoring capabilities (e.g., Gosund SP111, Sonoff POW):
-
Current Power: Watt (W)
-
Voltage & Current: Volt (V) and Ampere (A)
-
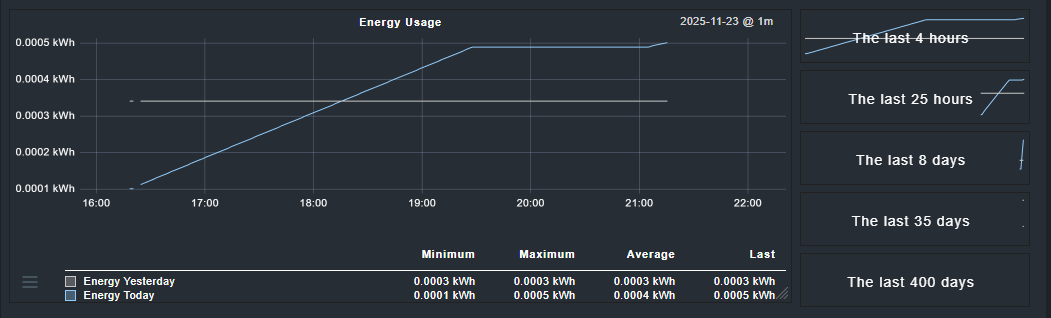
Energy Consumption:
-
Today (kWh)
-
Yesterday (kWh)
-
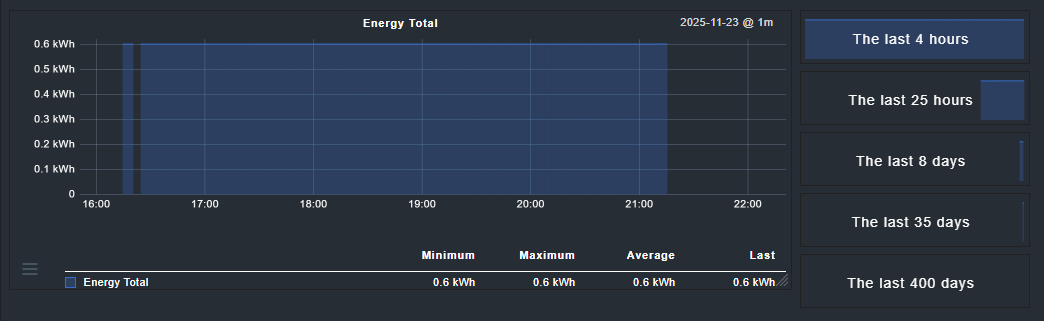
Total (kWh)
-
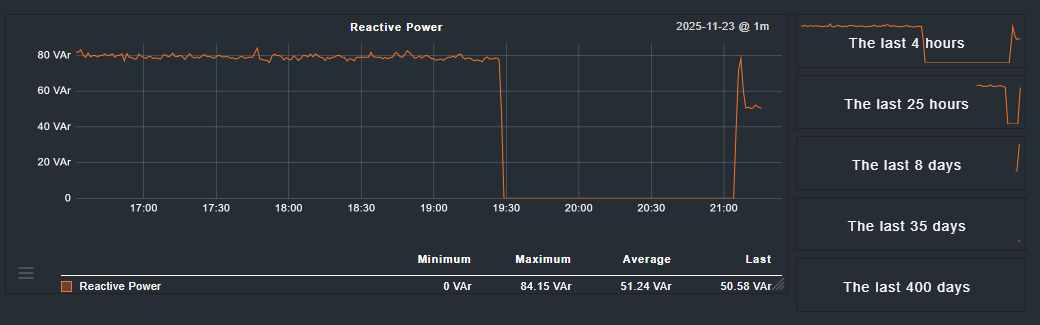
Additional Metrics: Apparent Power (VA), Reactive Power (VAr), and Power Factor
-
Thresholds: Warning and critical thresholds for power are configurable
Power State
-
Monitors the current status of the relay (ON/OFF)
-
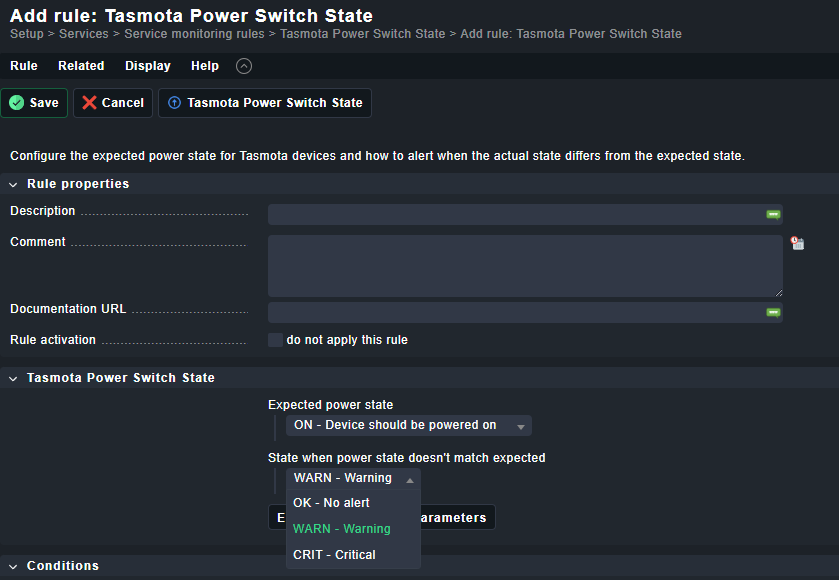
Configurable Expected State: You can define whether the device should be permanently switched on (e.g., for fridges or servers) and trigger an alarm if it is switched off
Additionally Supported Sensor List:
SHT3X | SHT30/SHT31/SHT35 Temperature and Humidity Sensor
SI7021 | AM2301 Temperature and Humidity Sensor
Check Documentation
Special Agent Ruleset
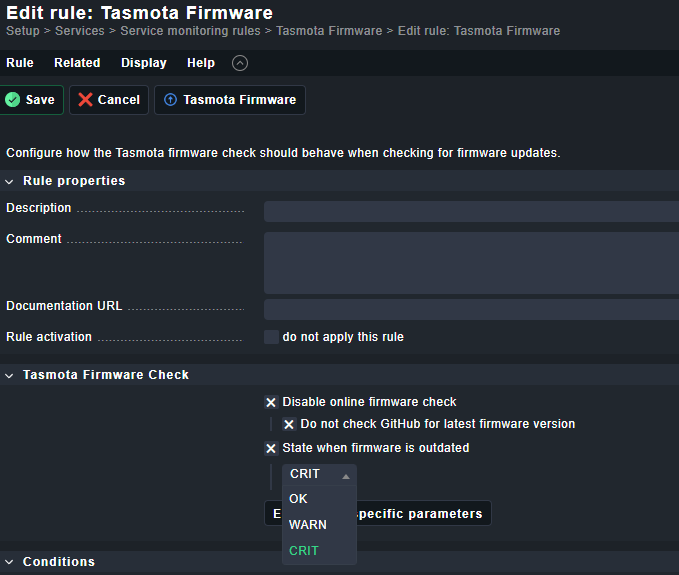
Firmware
Monitors the installed Tasmota version.
Firmware version will be fetched 2 times per day from GitHub.
You can configure and disable automatic firmware update checks in settings.Summary Details: Displays the build of current firmware, date and configured OTA update URL.
Ruleset
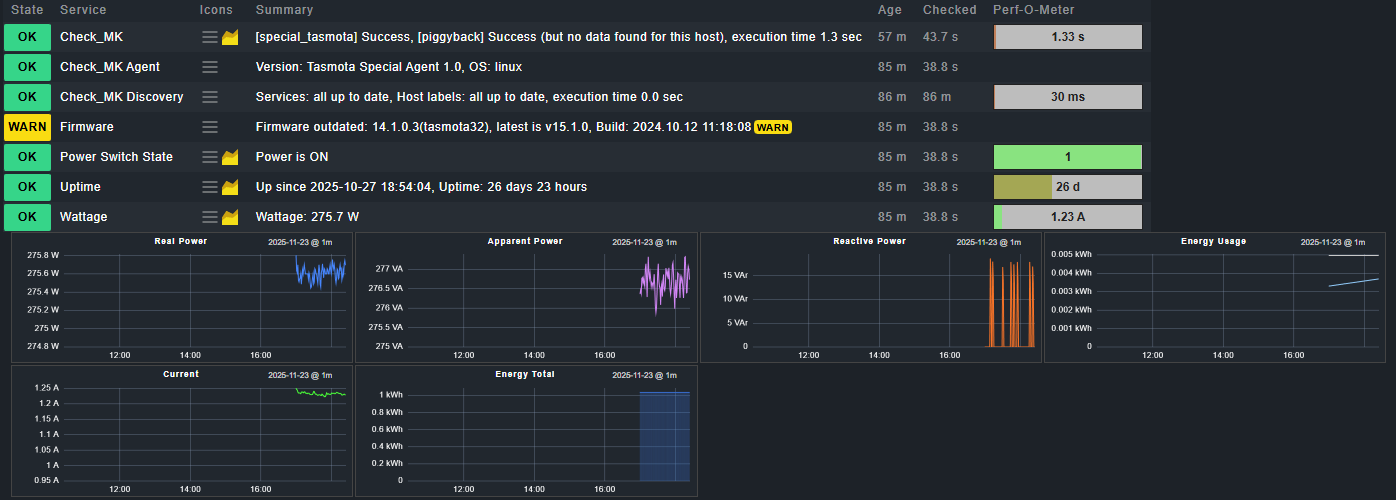
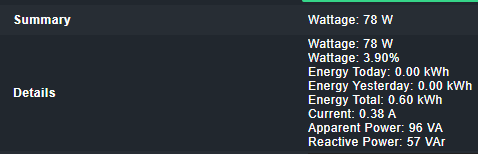
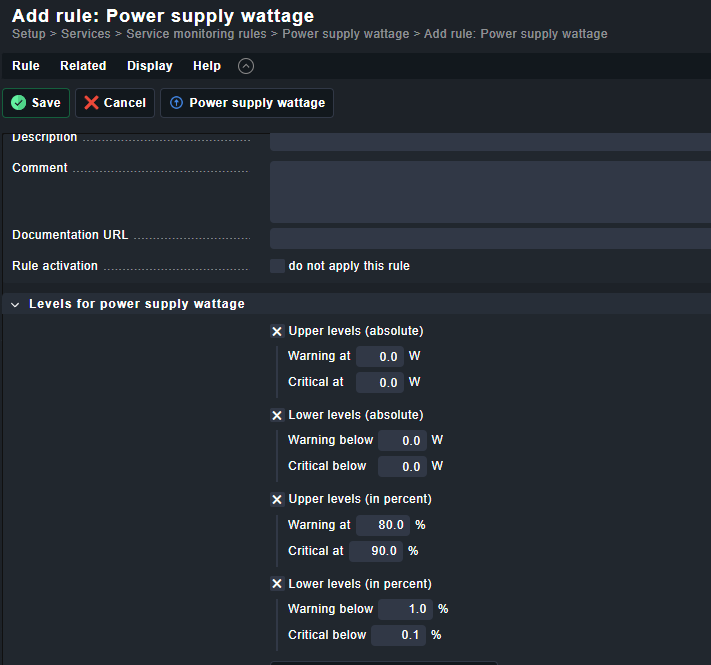
Wattage
Monitors power consumption and the following details output:
Uses default rulesets and check functions from CheckMK.Ruleset
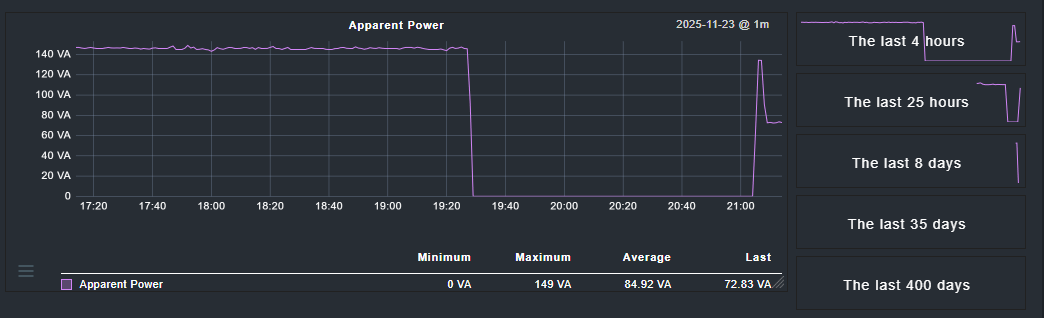
Note: If you use levels in percent, 2000W is hardcoded as 100% value in the check code.Metrics & Graphs


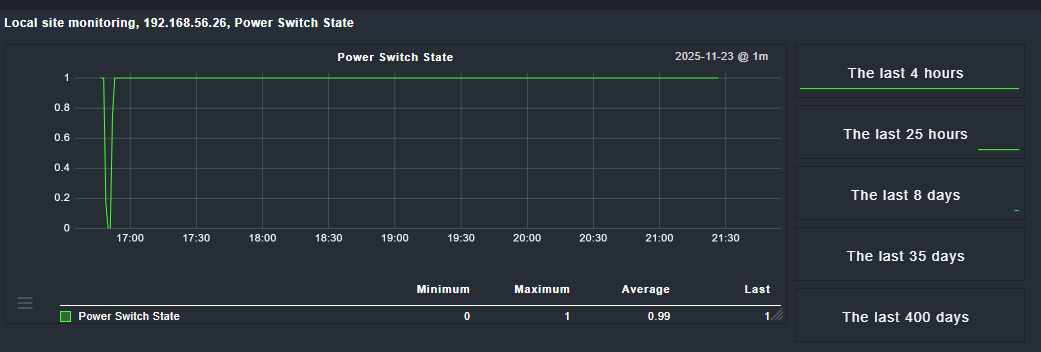
Power Switch State
Monitors the state of the relay if it is switched ON or OFFRuleset
Metrics & Graphs
Note: 0 = Relay Switch: OFF | 1 = Relay Switch: ON
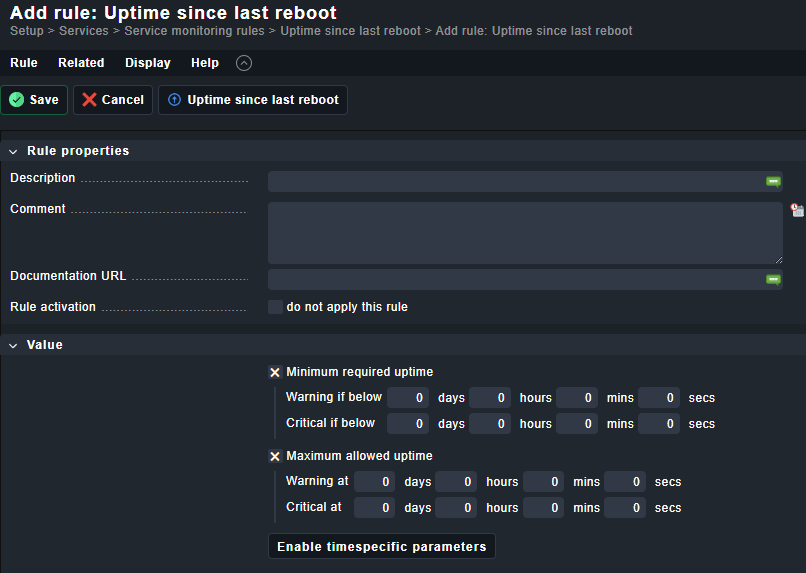
Uptime
Monitors the device uptime.
Uses the default rulesets and check function from CheckMK.
Ruleset
Additionally Supported Sensors
SHT3X | SHT30/SHT31/SHT35 Temperature and Humidity Sensor
I bought this one from Amazon for about 20€:
Sensor Probe, I2C Interface Soil Temperature and Humidity Sensor Probe, Soil Moisture Tester, Digital Waterproof Sensor Monitoring Meter (SHT31) : Amazon.de: Business, Industry & Science
There are hundreds of different other options on AliExpress like this for example (but I did not try this, it’s really just an example):
SHT31 Temperatur Feuchtigkeit Sensor Sonde Kabel Wasserdichte IP67 304 Edelstahl Digitale Kapazität Sensoren OEM Länge I2C Ausgang - AliExpress 502

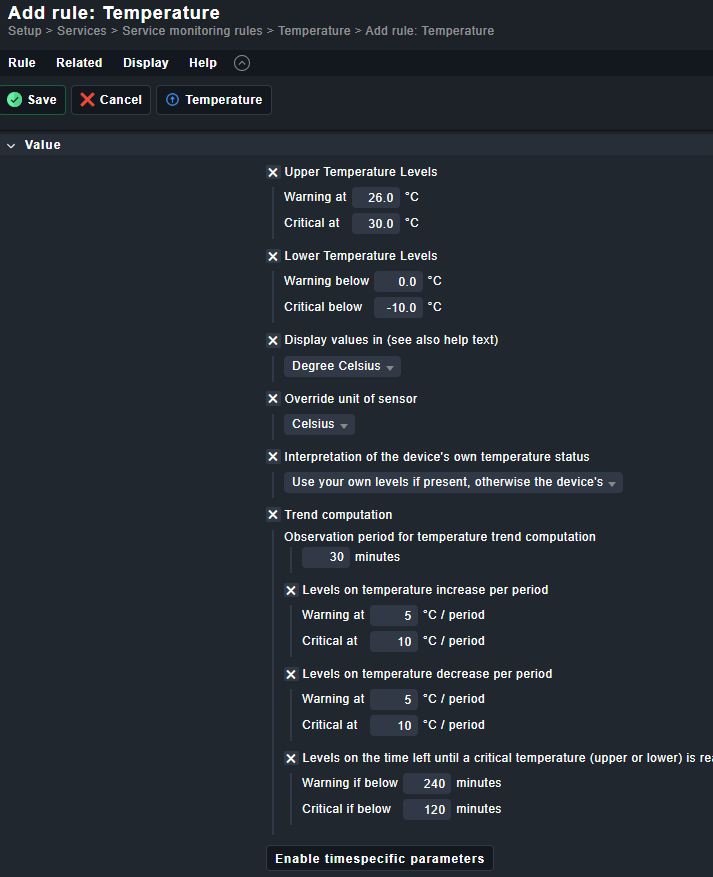
SHT3X Temperature / SHT3X DewPoint
Note: Temperature check uses default check and ruleset from CheckMK.
Ruleset
Metrics & Graphs
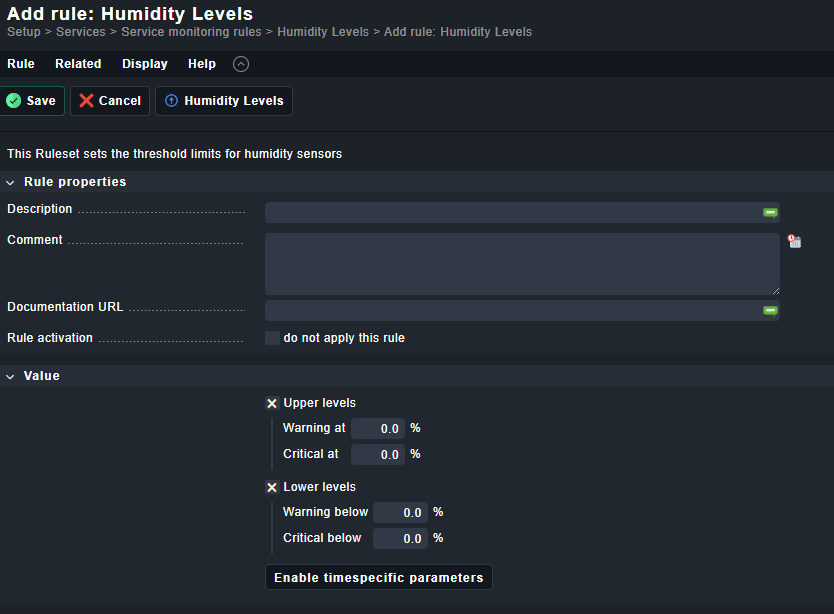
SHT3X Humidity
Note: Humidity check uses default check and ruleset from CheckMK.
Ruleset
Metrics & Graphs

SI7021 | AM2301 Temperature and Humidity Sensor
I bought this one from Amazon for about 12€ and connected it to a Sonoff TH16 flashed with Tasmota:
Aihasd AM2301 Temperature and Humidity Sensor for TH10/TH16 : Amazon.de: Business, Industry & Science
There are hundreds of different other options on AliExpress like this for example (but I did not try this, it’s really just an example):
AM2301 Temperatur- und Feuchtigkeitssensor mit 2,5-Kopfhörerstecker 18B20 wasserdichter Temperatursonde WLAN Smart Home - AliExpress 502SI7021 Temperature / SI7021 DewPoint
Note: Temperature check uses default check and ruleset from CheckMK.
Ruleset
Metrics & Graphs
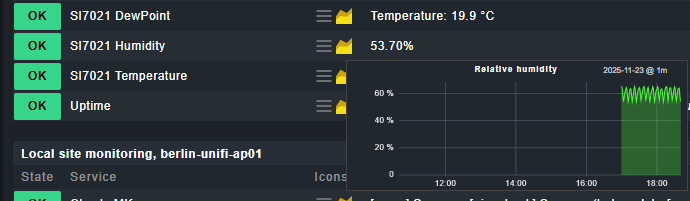
SI7021 Humidity
Note: Humidity check uses default check and ruleset from CheckMK.
Ruleset
Metrics & Graphs


PoC Project
Humidity and Temperature Monitoring of a Room with WiFi Only Option
Tasmota Quick Setup Guide
I bought this on Amazon:
This is an ESP32 board with USB-C connector and WiFi included. We can use the easy setup way and flash Tasmota directly on the board without any programming skills needed.
The board from M5Stack is the perfect all-in-one board because it already has a case and a 4-pin I2C connection port, so it is easy for us to connect the sensor.
Additionally, I bought the following 2 parts on Amazon:
That’s how my Amazon order was looking:
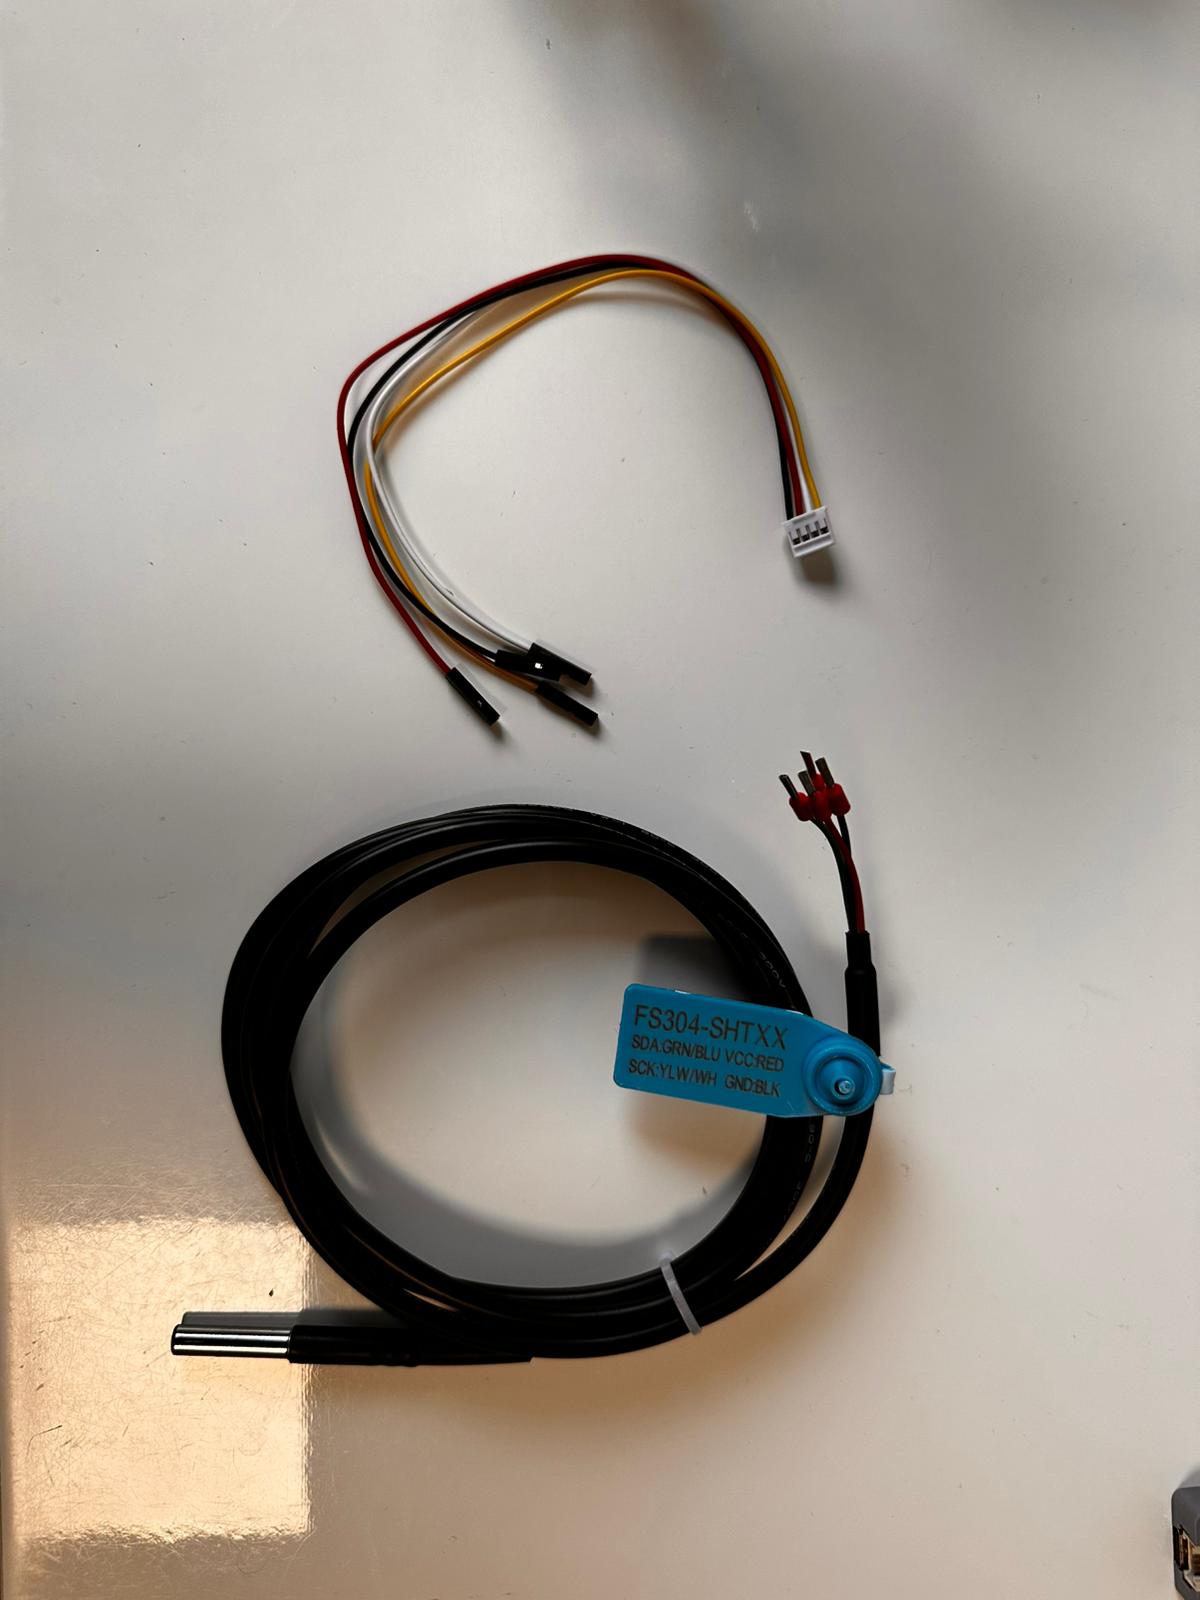
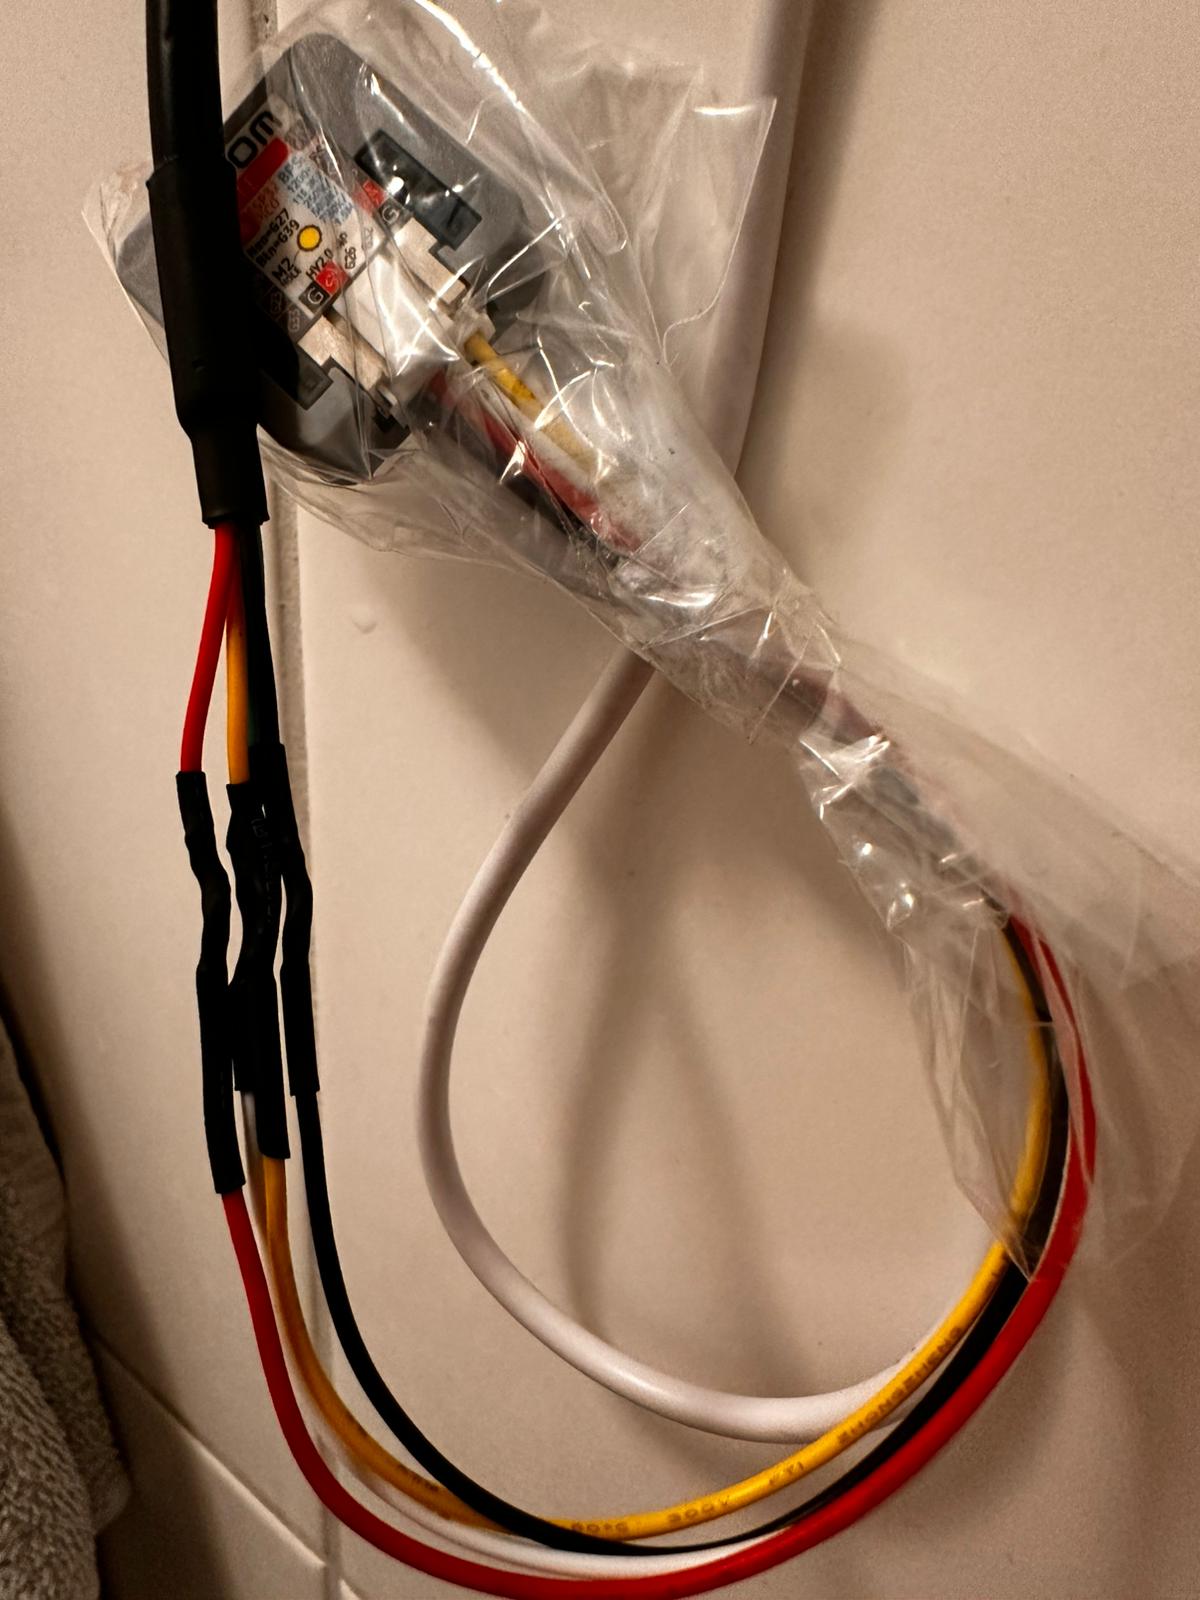
And that’s the picture of how I connected everything together:
The 4-pin cable can be connected directly to the M5Stack board, the other 4 ends of the cable just need to be connected with the SHT31 sensor.
And that’s it with the technical stuff! ![]()
Flashing Tasmota Firmware
Connect the M5Stack board with a USB-C cable to your computer and open the following URL:
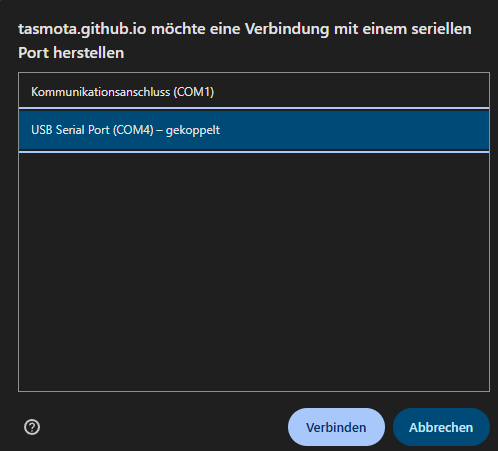
Click on “Connect” and allow the connection to your M5Stack board:

You should see the serial port of the M5Stack board and Google Chrome should ask you to connect.
Google Chrome should detect the board and ask you to flash Tasmota:

Click on “Install Tasmota”
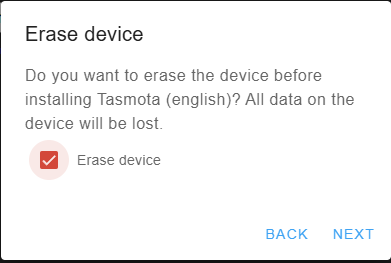
Erase device and click on “Next”
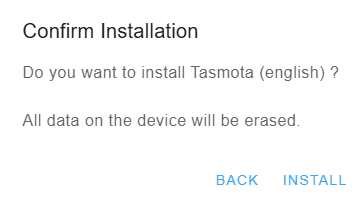
Confirm “Install”
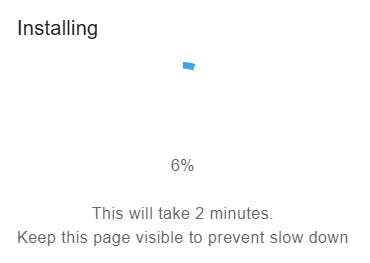
After this, the device will be erased and flashed with Tasmota.
While flashing, prepare and keep your WiFi credentials ready for the next step!
Installation complete, click on “NEXT”

Now click on “CONNECT TO WI-FI”


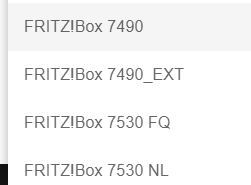
Select your WiFi and enter your password, then click on “CONNECT”

Your device is now connected and should be visible via web interface now.
Configuring M5 Stack Board
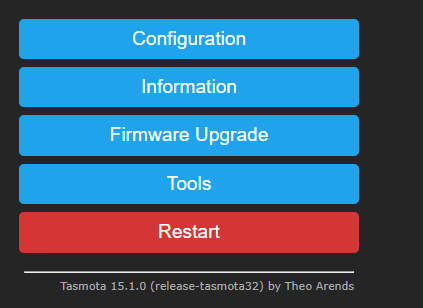
Visit the web interface of the board.
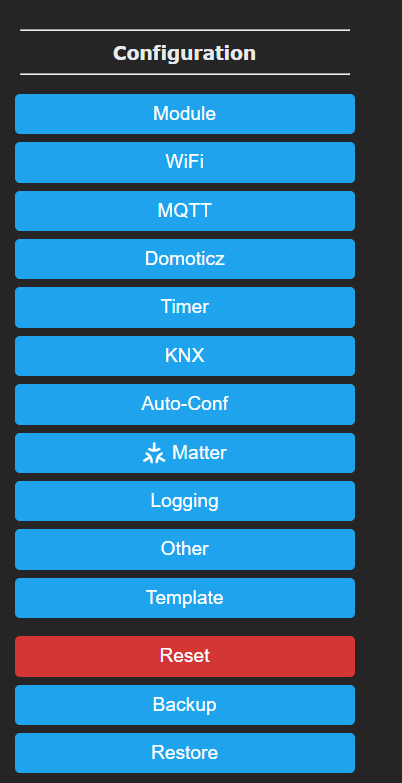
Click on “Configuration”
Now click on “Auto-Conf”
Apply the device configuration of “M5Stack Atom Echo”
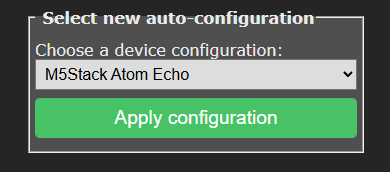
After this, the device should reboot and everything should be up and running.
The device has an RGB LED on board, let’s have fun playing around with it! ![]()

Secure Web Admin Password
I would highly recommend setting a web interface password to protect from unauthorized access. Someone who has access can also flash the firmware on the device and change settings.
Unfortunately, the web interface cannot be secured with HTTPS because the flash storage on Tasmota devices is usually too low to make TLS encryption. So you should keep in mind how to secure access to the device if you think about using it in companies. At least you should stay internal. My device is only running in an internal network.
Click on Configuration → Other
Enable “Web Admin Password”, enter your password and click on “Save”
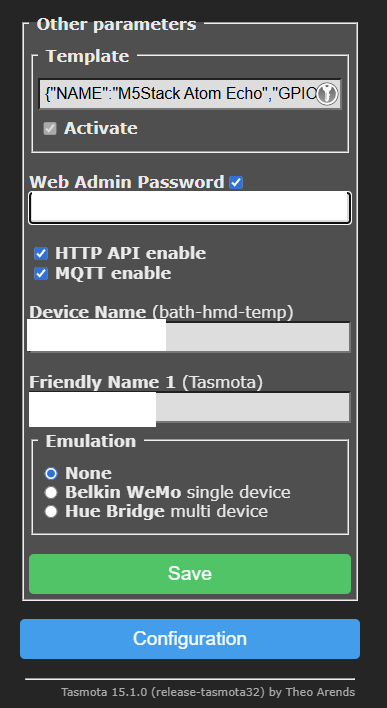
Also, API access has to stay active.
You are done, that’s it! Now we just need to configure our device in CheckMK.
Add Device in CheckMK
To show you the easy way how to get everything up and running fast, I decided to use the CheckMK Enterprise Edition in this guide, because then you can use the advantage of the “Extension packages” feature.
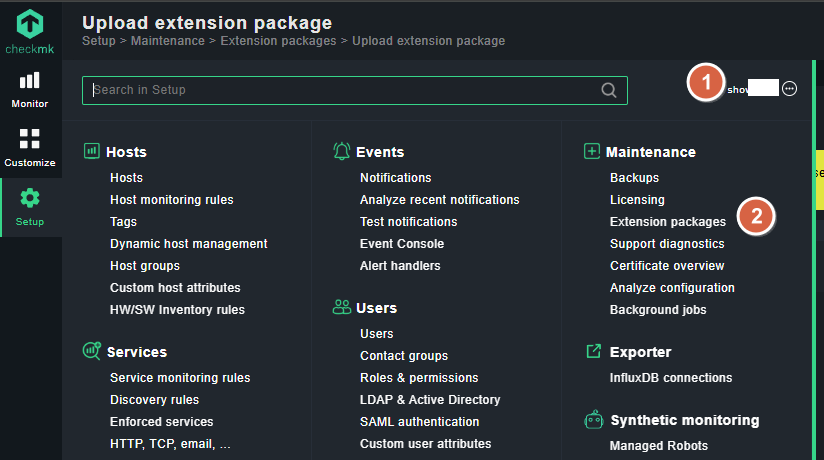
In the Setup menu, click on “Show more” to show you the menu “Extension packages”.
Then click on the link:
Upload the .mkp package:
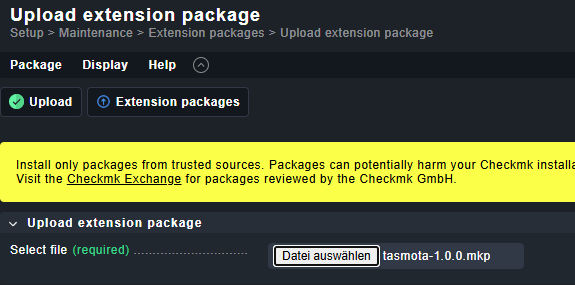
Enable the package:
![]()
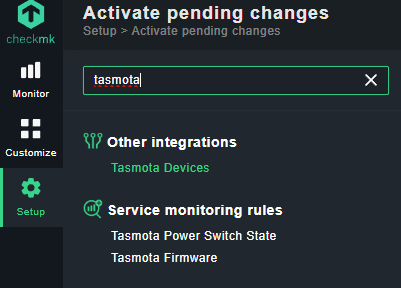
Activate changes:

Configure Your Device in CheckMK
Create a host for your device in CheckMK:
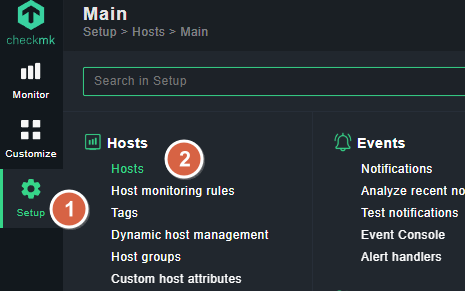
Click on “Setup” and “Hosts”:
Then add host:

Configure host name and IPv4 address of your device and set the marked settings.

After this, click on “Save & view folder”

If you have multiple sensors, just add them one by one.
I know there are tricks how to organize everything in folders, etc., but the guide stays simple…
Activate your changes now…
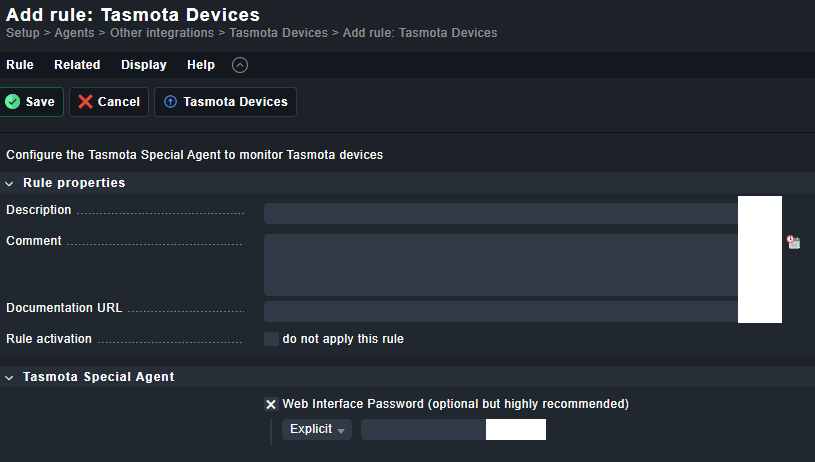
Now create an agent rule for your devices:
Configure the rule like this. If all your devices have the same web GUI password, you can push them all together in the same rule like here:

Save the rule and activate changes.
Discover Services
Now go back to Setup → Hosts
Select your Tasmota hosts and click on “Hosts”
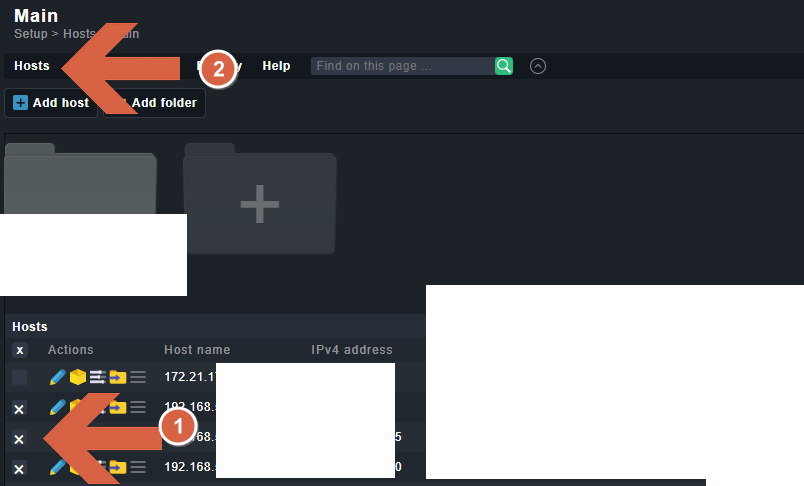
“On selected hosts” → “Run bulk service discovery”

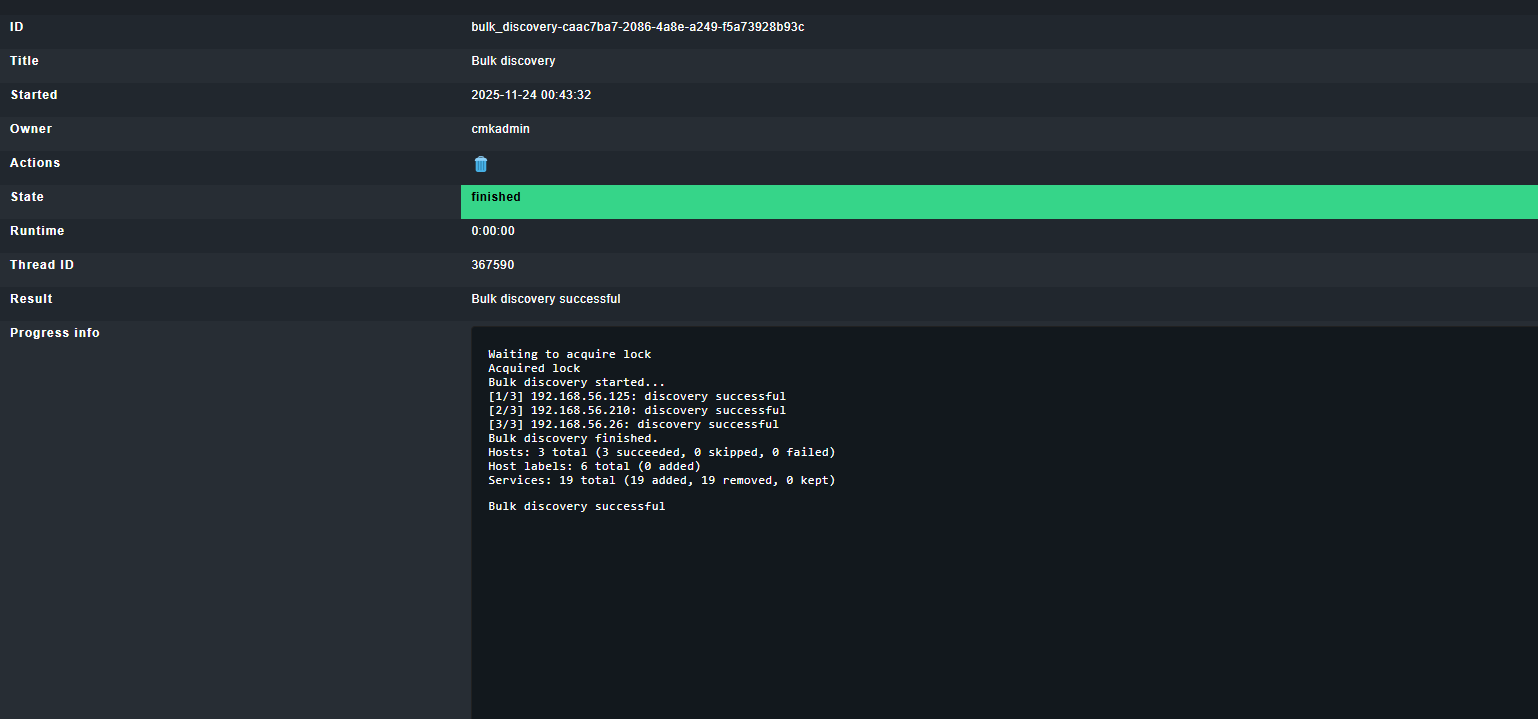
Select settings as shown in the picture and click on “Start”:

As we can see, in my setup, 3 Tasmota devices got discovered and services got added.
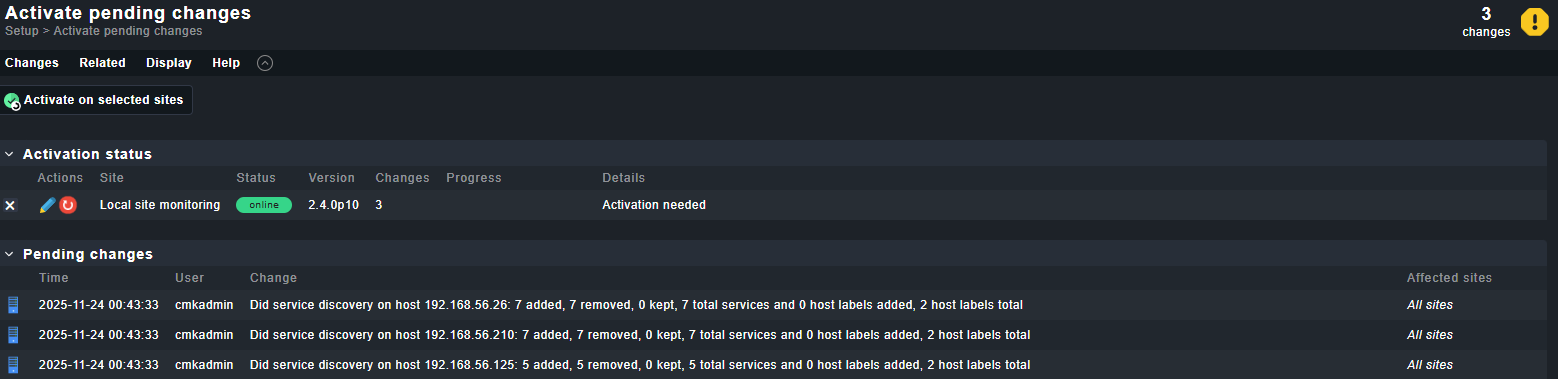
Now activate changes again.
We are done, that’s it! You should see your Tasmota devices including all supported sensors.
The rest of the guide is configuring some more settings, but CheckMK already monitors the devices.
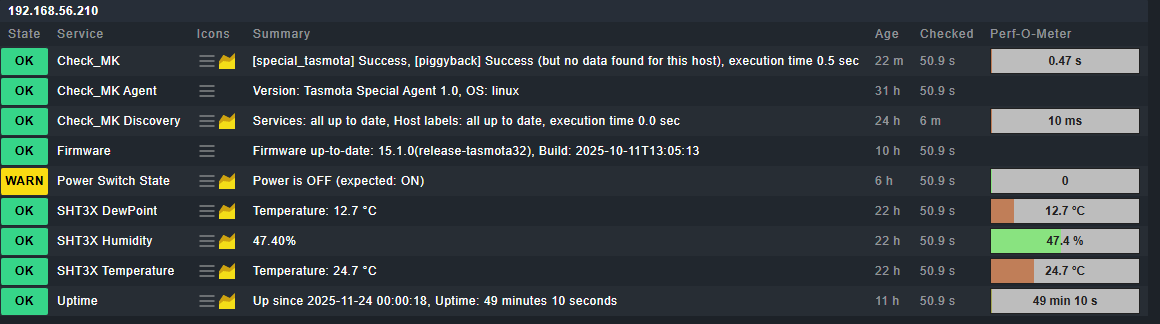
You should now see all your added hosts in the all hosts overview:
As you can see, I already have some issues with my Tasmota devices… let me check…
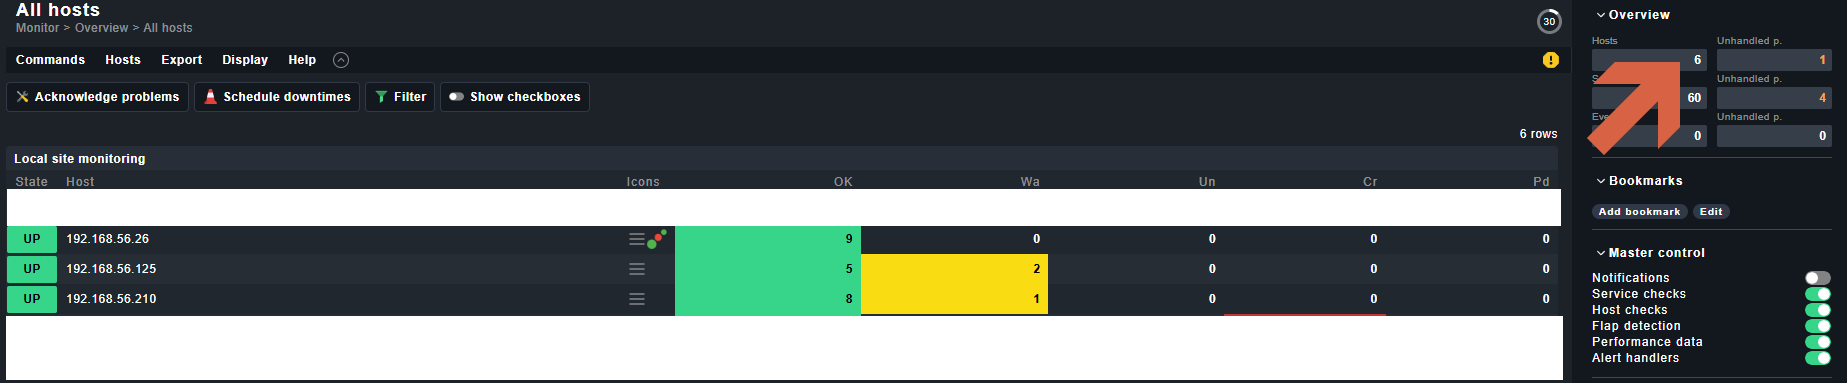
Click on the issues:
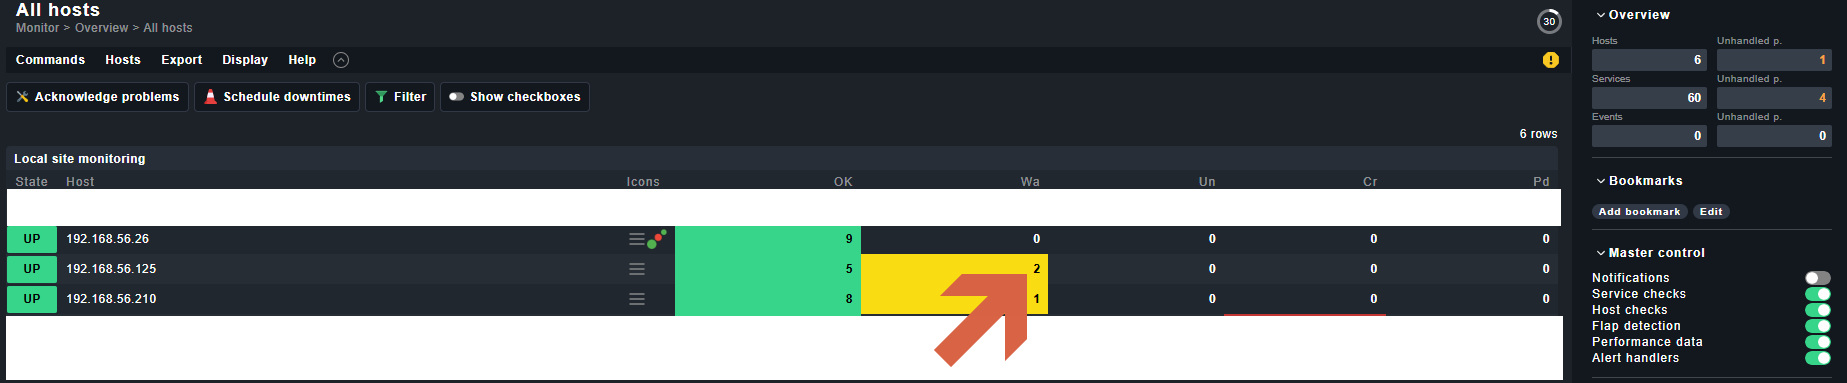
As you can see, I have an outdated firmware and a power switch which is “OFF”.
In this guide, we change the settings to expect this plug to be “OFF”, then the check should be changing back to “OK”.
Click on “Host” → “Run Service discovery”
Click on the marked striped colors to open the ruleset:

Add a rule for current host:
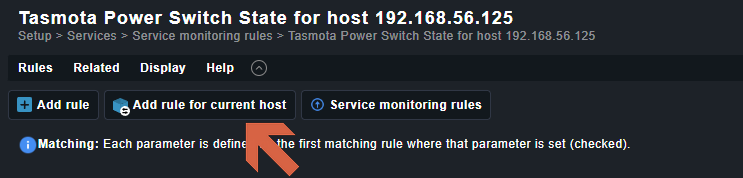
I changed the settings for my host to the following settings. The check should now go to “CRIT” if I would switch it on, but if it is “OFF”, the check should now change to “OK”.

Save the setting and activate changes.
Go to the overview of your host and wait around 1-2 minutes for the next check cycle, the check should now change to “OK”.

As shown, you can now change every kind of setting however you need it.
Have fun! ![]()